
Soil Testing
Have you ever walked down the garden aisle of a home improvement store and felt overwhelmed by the number of fertilizer options? It can be daunting to find the right one for your landscape or garden, especially if you aren’t sure what your soil needs. Luckily, soil testing can take away the guesswork and let you know exactly what type of fertilizer to use.
Soil testing can be helpful before planting because it lets you know the nutrient availability. If your soil is lacking necessary nutrients, your newly planted crops won’t have their needs met. On the other hand, applying unnecessary fertilizer is an added cost and can harm the environment. Soil testing is a quick and easy way to avoid problems on both ends of the spectrum.
The Process
As of February 15, 2023, you will have two options for where to send your soil for testing. The traditional option is to send your sample to the UF/IFAS Soil Testing Laboratory. The newer option is to use the SoilKit® testing kit, which is the product of a UF/IFAS partnership with AgriTech Corp. This kit provides an easy-to-use soil testing platform with consumer-friendly results.
Both tests provide the same analysis; the main difference is that the cost of SoilKit® is all inclusive (meaning you don’t have to pay additional shipping) and the results are designed to be easy to comprehend, even if you are new to soil science. It also considers your local fertilizer ordinances to help you comply with them. Both test options are available at your county Extension office and are based on UF/IFAS research. Your county Extension agents can help you select the test that will work best for your needs.
Before getting a testing kit, you need to decide how many samples to take. You should send separate samples for turf areas, vegetable gardens, and ornamental beds. If there are any specific problem areas, samples from those regions should be sent separately as well.
Once you have a number of samples in mind, visit your county Extension office for materials and to ask any questions you may have. The Extension office will provide bags for each soil sample, shipping materials, and the necessary forms. SoilKit® test kits are also available online at soilkit.com/florida.
Now you are able to begin the sampling process.
Tools needed for sampling:
- Digging tool such as a soil probe or shovel
- Bucket
- Clean paper bag or newspaper
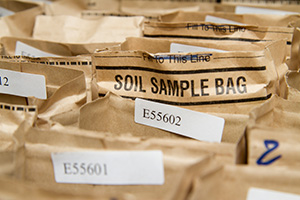
- Soil sample bags
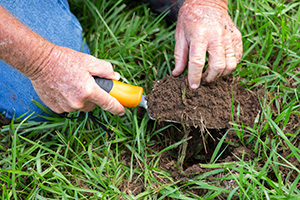
For your first sample area, use your probe or shovel to dig 10-15 scoops of soil and add them to your bucket. You should take the upper 2-4 inches of soil from lawn areas and the upper 6 inches of soil for garden or landscape areas. Space out your collection sites throughout the area so the sampling will be characteristic of the entire space. Be sure to remove any mulch or plant material that ends up in the bucket.
Next, use your hand to thoroughly mix the soil. Uniformity is the goal. Then, spread your soil out on the paper bag or newspaper to dry. Wet soil can’t be submitted for testing, so this step is important.
While you’re waiting for soil to dry, you can work on paperwork and labels. This step varies slightly depending on which test you selected.
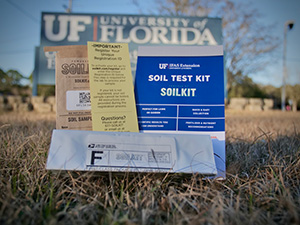
SoilKit® Testing Instructions
Start by registering your test kit online. You can do this by visiting soilkit.com and manually entering your kit ID or by scanning the QR code on your sample bag. This step must be completed before sending in your sample, or else the sample cannot be tested. Then, enter your address or use geolocation. You’ll need to enter the square footage of your area or use the satellite tool to identify your yard and select which parts will not be fertilized (such as your house, driveway, etc.).
You’ll need one kit for every 10,000 square feet.
Next, confirm what is being planted in the soil you are testing. This could be your lawn, ornamentals, or edibles, for example. Keep in mind that you should wait two weeks before sampling if you recently fertilized because this will cause inaccurate results. Payment is also submitted online during registration.
Once you’re done with registration, go ahead and fill your sample bag to the fill line with the dried soil. Then, write your name on the sample bag. Place the bag in the pre-labeled envelope, seal it, and send it in the mail. Make sure you keep the customer card with you because it has your kit ID for reference.
You will receive your results by email after one or two business days. You can view status updates in your online portal such as when your sample arrives at the facility, when testing is in progress, and when results are available. Note that at the bottom of the results page there are options for sharing. You can easily share them with your county Extension agent, landscapers, or anyone else who needs the information through methods such as text, email, and social media.
UF/IFAS Soil Testing Laboratory Instructions
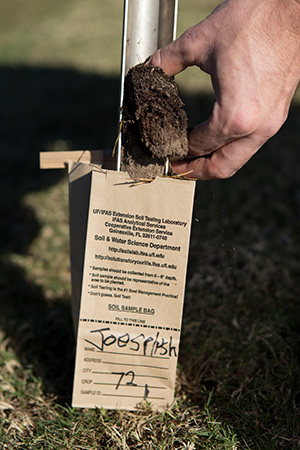
Only one form is needed for all samples. You will need to fill out the sample ID, county, crop code(s), estimated acreage, and test cost for each sample.
The sample ID is simply a way to tell each sample apart, so you can label each bag as A, B, and C, or however is easiest for you to distinguish them. Crop codes are found on the back side of the test form and help the lab determine fertilizer recommendations specific to what you are growing. Each area can have more than one crop code.
The test cost varies depending on your needs. If you simply need to know which complete fertilizer to use, you should select “Test A.” If you want to be more involved in building your fertilizer, you should select “Test B” to see which single-element fertilizers to purchase.
After your soil is done drying, pour about half a pint of soil into the labeled sample bag for each sample (to the dotted line). Then, pack the sample bags, test form, and payment to be shipped. A check or money order is acceptable and should be made out to the “University of Florida.”
Finally, mail the box to this address:UF/IFAS Analytical Services Laboratories
Extension Soil Testing Laboratory
Wallace Bldg. 631, 2390 Mowry Road
PO Box 110740
Gainesville, FL 32611-0740
Ask an agent at your county Extension office if you have any questions about the process, as they may vary by county. You should receive your results in the mail about a week after the testing lab receives the samples. If you provided an email address, you could see the results as soon as two days after testing. Your county Extension office will also receive a copy so they can assist with interpretation.
Interpreting Results
The test results will show you the current nutrient levels in your soil and recommend lime and fertilizer applications. These recommendations will be tailored to the crop type you specified, making it easy to prepare your site for planting.
The experts at your local UF/IFAS Extension office are happy to help if you have any questions about determining a testing plan, preparing soil samples, or interpreting results.