
Microgreens
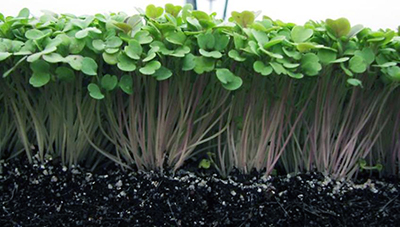
Microgreens are young, tender greens that people add to enhance the color, texture, and flavor of salads. These greens are harvested at the cotyledon stage, or just when the first true leaves emerge. The stem is snipped just above the soil and includes both the stems and leaves.
Microgreens are harvested when they are about 2 inches tall, including the stems and the leaves which are consumed as a whole. The flavor of microgreens is often more intense than when the same plants are harvested later for just their leaves. Microgreens are not the same as baby greens, which are larger, or sprouts, which are harvested earlier and contain the roots but not the true leaves.
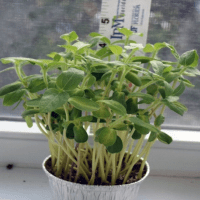
Microgreens are sometimes called vegetable confetti; these tiny greens can sure add a lot of fun color and nutrients to any dish you prepare. They are great for use in soups, stews, salads, sandwiches, main dishes, and as garnishes. The kitchen window is an ideal place to grow them — you can keep a close eye on them and have them right where you need them when you’re ready to use them.
Choosing Greens
There are dozens of crops to choose from for growing microgreens; between 80–100 different crop varieties have been reportedly used! You won’t typically find lettuces used for microgreens though, as they are a bit too delicate and wilt easily.
Fast-Growing Microgreens
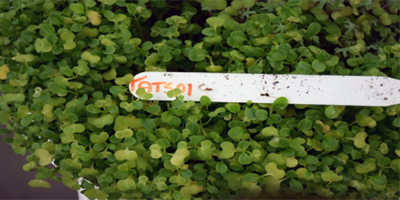
Red cabbage, Chinese cabbage (Kogane), collards (Champion), cress (Cressida and Persian), hon tsai tai, kale (Red Russion and Tuscano), kohlrabi, mizuna, mustards (except Red Giant), pac choi (Rosie), radish, tatsoi
Slow-Growing Microgreens
Anise, anise hyssop, amaranth (Garnet Red), arugula, basils, beets, carrots, chards, chervil, cilantro, cutting celery, dill, fennel, komatsuna, lemon balm, magenta spreen, marigold (Gem), mustard (Red Giant), orach (Ruby Red), pac choi (Red Pac), parsley, purslane (Red Gruner), salad burnet, scallion (Evergreen Hardy White), shungiku, saltwort, shiso (Britton)
Growing
Microgreens should be grown in a standard, sterile, loose, soilless, germinating media.
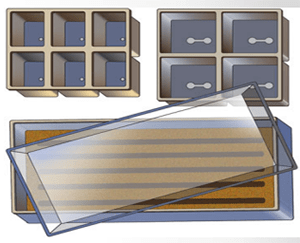
For growing microgreens use a container that is 2 to 3 ½ inches deep, food grade, and sterile. If you grow your microgreens in small trays, you’ll need to harvest with scissors. Ideal media for germinating your seeds includes peat moss, coconut fibers, shredded sphagnum (all three hold water well), vermiculite (which holds water and is lightweight), perlite (which is light with great air flower and drainage) or a combination of any of the above. You can also use a commercial mix like Sungrow Fafard® Germination Mix, which is a very fine media with high water-holding capacity.
Start by filling your containers with moistened growing medium. You can broadcast or plant your seeds in rows. A general rule of thumb for growing microgreens is to plant 10–12 seeds per square inch if seeds are small and 6–8 seeds per square inch for large seeds.
Some seeds benefit from soaking before planting: beets (24 hours), cilantro (2 hours), buckwheat (12 hours – rinse and drain seeds twice daily for 2 days), peas (8–12 hours), sunflower (8 hours), nasturtium (8 hours), popcorn (8 hours), winter wheat (8 hours).
Seeds should be gently pressed into the surface. Some seeds benefit from being covered lightly with media or fine vermiculite; this optional step is more important for larger seeds. After you’ve gently pressed the seeds onto the surface of the media, mist them with water and then cover them. Seeds may need some warmth to germinate; the temperature needs vary between seeds.
Seeds that do not need a cover are broccoli, cabbage, lemon balm, mint, oregano, and thyme. Light cover works best for amaranth, arugula, basil, beets, chervil, dill, fennel, kale, mustard, pea, sage, shiso, sorrel, tatsoi, and wasabi. Cover is best for carrots, celery, Swiss chard, chive, cilantro, parsley, radish, sunflower, and watercress.
The time it takes a seed to germinate will vary between the crops. It also depends on the temperatures. Keep your trays covered and in a dark place for 4–5 days (or until seeds germinate). During this time, remove the cover and mist the seeds twice a day. The day after leaves emerge, remove the cover and move the tray to an area where it will get sunlight. Place your seeds in a south-facing window for best light and turn your container 180 degrees each day so that the entire tray gets sunlight.
The best time to harvest your microgreens is at night or in the morning. They should be cut with scissors or an electric knife just above the soil line. They can be washed and used fresh or stored in the refrigerator in a plastic container; they generally keep for 5–6 days in the fridge. For best storage results, store microgreens in a container that has air holes.
Depending on the crop, you may be able to get more than one more small harvest—however, the initial harvest is definitely the best. Once you are done you can mix the leftover soil and vegetables into your planting area or compost.
Special thanks to UF/IFAS expert Terry DelValle. For more information, check out her presentation “Growing Microgreens Can Be For Everyone,” from the 2017 Florida Master Gardener Volunteer Conference (pdf).