Soil Solarization
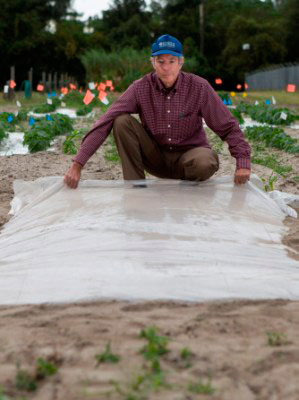
UF/IFAS researcher Bob McSorley demonstrates soil solarization. (Photo: Tyler Jones, UF/IFAS)
Looking for a way to manage soil pests in your vegetable garden without using chemicals? Soil solarization is a technique that uses the sun's energy to battle pests and diseases in your soil. It's especially effective against nematodes, tiny worms that feed on the roots of plants.
With soil solarization, a sheet of plastic is used to cover the soil surface, allowing the soil to reach temperatures that are lethal to many pests and weeds.
Deciding if solarization is right for your garden is about weighing the good and the bad. Like most pest management efforts, there is a down side to soil solarization: the high temperatures needed to kill all the unwanted soil occupants will also kill many beneficial organisms. It may help to know that often the beneficial organisms will return more rapidly than the harmful ones.
How it Works
If you decide soil solarization is something you'd like to try, it's important to understand how the process works. A sheet of plastic is used to cover the soil surface for six to eight weeks. Clear plastic is used so that sunlight is able to pass through it. The soil warms and the plastic traps the heat allowing the soil to reach temperatures that are lethal to many pests and weeds. When done effectively, soil solarization can reduce pest populations for three to four months, and in some cases even longer.
You can solarize any type of Florida soil and anywhere, be it raised beds or flat ground. Generally, this process will be most effective in areas that receive full sunlight during the day as any shade produced by trees or buildings will hinder the process. June, July, and August are the best months to solarize your soil since this is when temperatures are highest.
To prepare your site for solarization, you'll want to clear the area of weeds and debris and incorporate any soil amendments that you plan to add. You can till into the top six inches of soil to help increase heat penetration, although this isn't necessary. Rake the area smooth, making sure the space "crowns" in the center so that rainwater won't collect on the plastic and cool the soil.
Moist soil is best for solarization as moisture helps to conduct heat. If possible, apply your plastic the day after a rain or irrigation. Solarization will not work as well on very dry soil or, alternately, very wet soil. Heavy, muddy soil can get the plastic dirty which will disrupt the process; remember, you want clear plastic to allow for total penetration of sunlight.
The plastic sheet should be a little larger than the area you are treating. At present, there are no recommendations about type or brand of clear plastic to use. Some people think thinner plastic is better, but maybe the main consideration is that the plastic should be strong enough to last for 6 weeks in the summer sun in Florida without breaking up. For information on choosing a solarization plastic, please consult the IFAS publication, "Solarization for Pest Management in Florida."
Stretch the plastic tightly over the prepared area you are treating and seal the edges by completely burying them in the soil. Make sure they stay buried for at least six weeks. You will know your solarization is not working if weeds continue to grow in the area under the plastic. If you develop any holes in the plastic, a small piece of duct tape can be used to seal the area; this fix will usually not block enough sunlight to hurt the solarization process.
If your solarization has been successful, you should see a reduction in weeds and soil pests for the next three to four months—long enough to grow a fall garden! Follow these links more information on soil solarization, or contact your local Extension office.